Hato Workshop
Preserved Flower Photo Frame | Green & White Series | Set of 5
Preserved Flower Photo Frame | Green & White Series | Set of 5
Regular price
HK$440.00
Regular price
HK$108.00
Sale price
HK$440.00
Unit price
per
Shipping calculated at checkout.
Couldn't load pickup availability
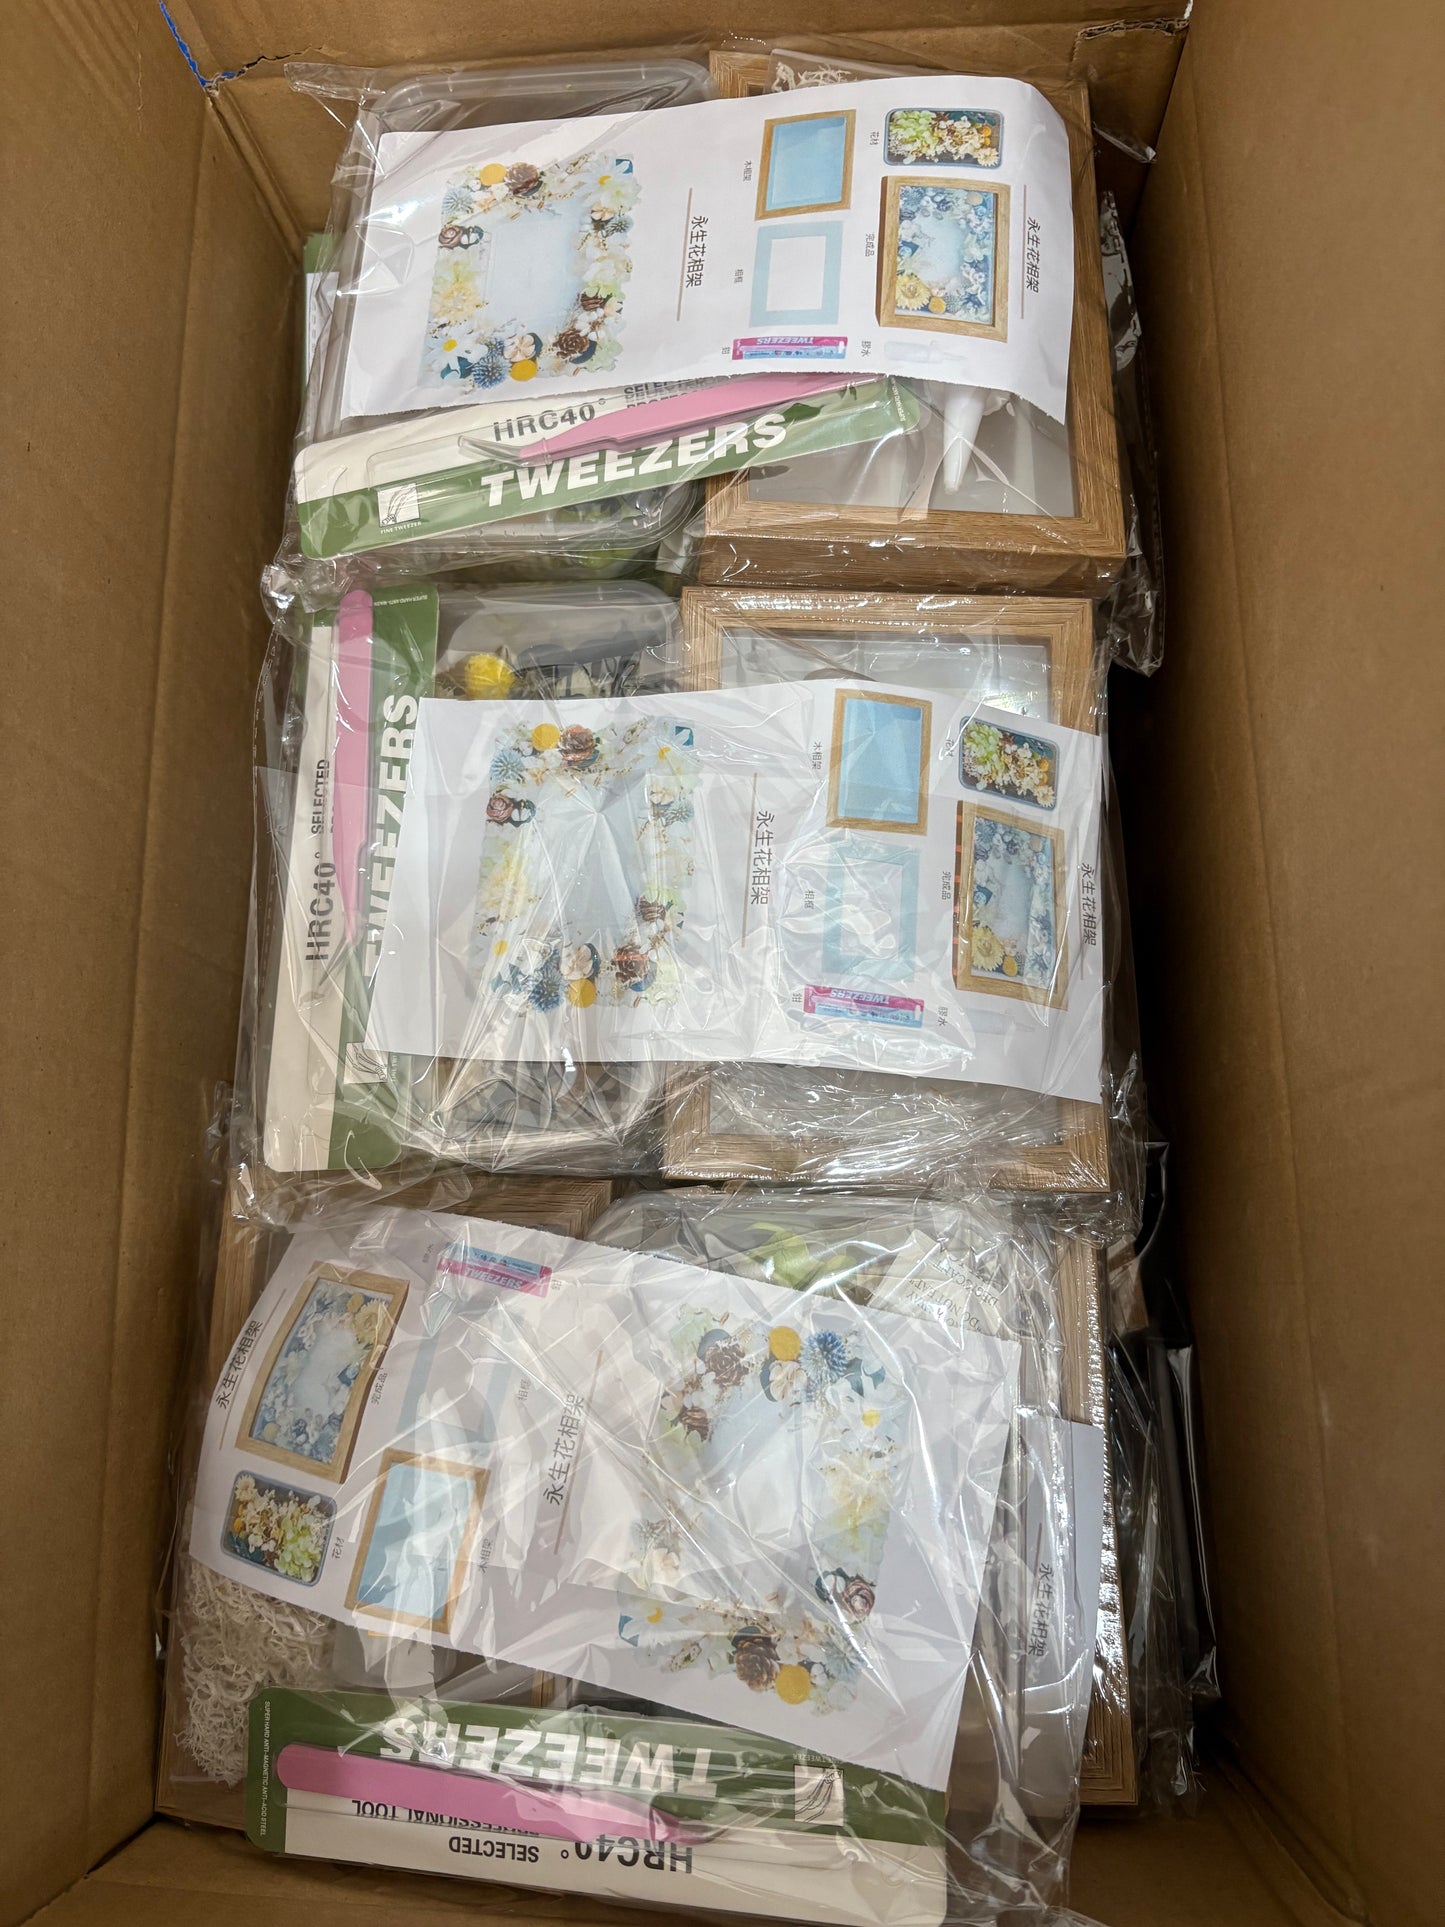
A set makes 5, not sold individually
A. Product Information
Difficulty: ★☆☆☆☆
Production time: Approximately 45 minutes
Size: 10x15cm
Material Kit: Floral materials, glue, wooden photo frame base, photo frame, pliers
*The actual product may have color differences due to lighting
*This product is a material kit and requires self-assembly
*We use natural floral materials. Some materials may be substituted based on the flowering season, so there may be some variations in color and shape
Customer Service: Whatsapp +852 6104 5134
B. Production Tutorial
- Sort Floral Materials: Pour out the floral materials and roughly sort them by size and type (e.g., main flowers, filler flowers, foliage) for easy access.
-
Dry Run: Place the wooden frame flat and begin experimenting with the placement of the floral materials on it.
- Recommended Order: Decide on the position of the largest, most eye-catching "main flower" first. Placing it in a corner (e.g., bottom left or top right) is usually more aesthetically pleasing than placing it in the exact center.
- Add Layers: Then, surround the main flower with secondary flowers and foliage to fill in the gaps. Let some leaves extend slightly beyond the frame for a natural, growing look.
- Consider Color: Coordinate the flower colors with the color scheme of your photo to create a more harmonious overall style.
-
Start Gluing:
- Glue One by One: Following the "design" you just took a photo of, start gluing from the bottom layer, beginning with the largest foliage or flowers.
- Insert Photo: Carefully place your photo into the frame, let it sit for at least 1-2 hours, to ensure the glue is completely dry and the floral materials are secure and will not fall off.
C. Purpose of Production
| Target Group | A. Learning and Training | B. Benefits and Development |
|---|---|---|
| Seniors | 1. Tool Application Training: Learning to use basic tools like pliers, which trains hand strength control in addition to fine motor skills. 2. Spatial Layout Planning: Creating on a fixed 10x15cm canvas provides better training for overall composition and spatial balance compared to working within a small circle. |
1. Connection to Emotion and Memories: Placing memorable old photos (e.g., children in their youth, photos with a partner) into a handcrafted frame turns it into an object of emotional sustenance and storytelling. 2. Enriching Living Environment: The finished product is a practical home decor item that allows them to personally add beauty and personal flair to their living space, improving quality of life. |
| Children | 1. Introductory Tool Safety Education: Under adult supervision, the first exposure to learning how to use pliers safely is excellent tool enlightenment. 2. Introduction to Graphic Design: Learning how to decorate around a theme (the photo in the center) on a two-dimensional plane, establishing the concepts of foreground and background. |
1. Strengthening Family Values: Making a frame specifically for displaying family photos helps them feel the warmth of family and deepens their sense of belonging to "home." 2. Learning to Create "Valuable Gifts": A photo frame is a more substantial gift than accessories, suitable for Mother's Day, Father's Day, etc., helping children understand the value of combining heart with practicality. |
| Teenagers | 1. Practice of Visual Art Principles: Directly applying art principles learned in class, such as composition, color matching, and visual focus, to the design of the frame. 2. Multi-material Combination Techniques: Learning how to combine fragile floral materials with a hard wooden frame and thinking about adhesion and matching between different materials. |
1. Creating a Personalized Space: Making a unique frame for their room or desk to display photos with friends or idols is an important part of building personal style and a private space. 2. Boosting Sense of Achievement: Completing an artistic and practical piece of home decor brings a greater sense of achievement and satisfaction than making small trinkets. |
| Adults | 1. Home Aesthetics Design Practice: More than just a craft, it's a small interior design exercise in thinking about how to integrate the piece into the overall home style. 2. Project-based Creative Thinking: From selecting photos (core content) to conceiving the design and then moving to implementation, experiencing a complete miniature project process. |
1. Creating a "Ritual of Memory": Handcrafting an exclusive "home" for a special moment (e.g., travel, anniversaries, pet photos) makes preserving memories more ritualistic. 2. Healing: Through the focus of beautifying objects closely related to one's personal life, it can bring deep relaxation. |
D. Common Problems During Production
| Problem Type | Potential Problems | Solutions |
|---|---|---|
| Tools and Materials | 1. How do I use the pliers? Will I break the flowers? 2. What if petals accidentally break off? |
1. Demonstrate using pliers to grip the "bottom of the flower stem" as an aid, not the petals. 2. This is normal; small flower fragments can be used to embellish gaps and add detail. |
| Design and Composition | 1. I have no idea; how should I arrange it so it looks good? 2. My design looks empty or messy. |
1. Arrange first, glue later. Place the largest main flower first, then surround it with small flowers. 2. Focus on just 1-2 corners; appropriate "white space" is more design-forward. |
| Gluing Techniques | 1. I squeezed out too much glue, and it overflowed. 2. The flowers don't seem to be stuck securely. |
1. Use a toothpick to apply glue to precisely control the amount. Overflow can be wiped away with a cotton swab. 2. After applying glue, gently press for about 15 seconds to help with initial fixation. |
| Assembly and Maintenance | 1. How do I reassemble the frame? 2. How do I maintain the finished product? Can it get wet? |
1. Instruct to insert the photo first, then attach the backboard and fasten the clips on the back. 2. Absolutely no water exposure. Avoid direct sunlight and moisture to preserve it for a long time. |