Hato Workshop
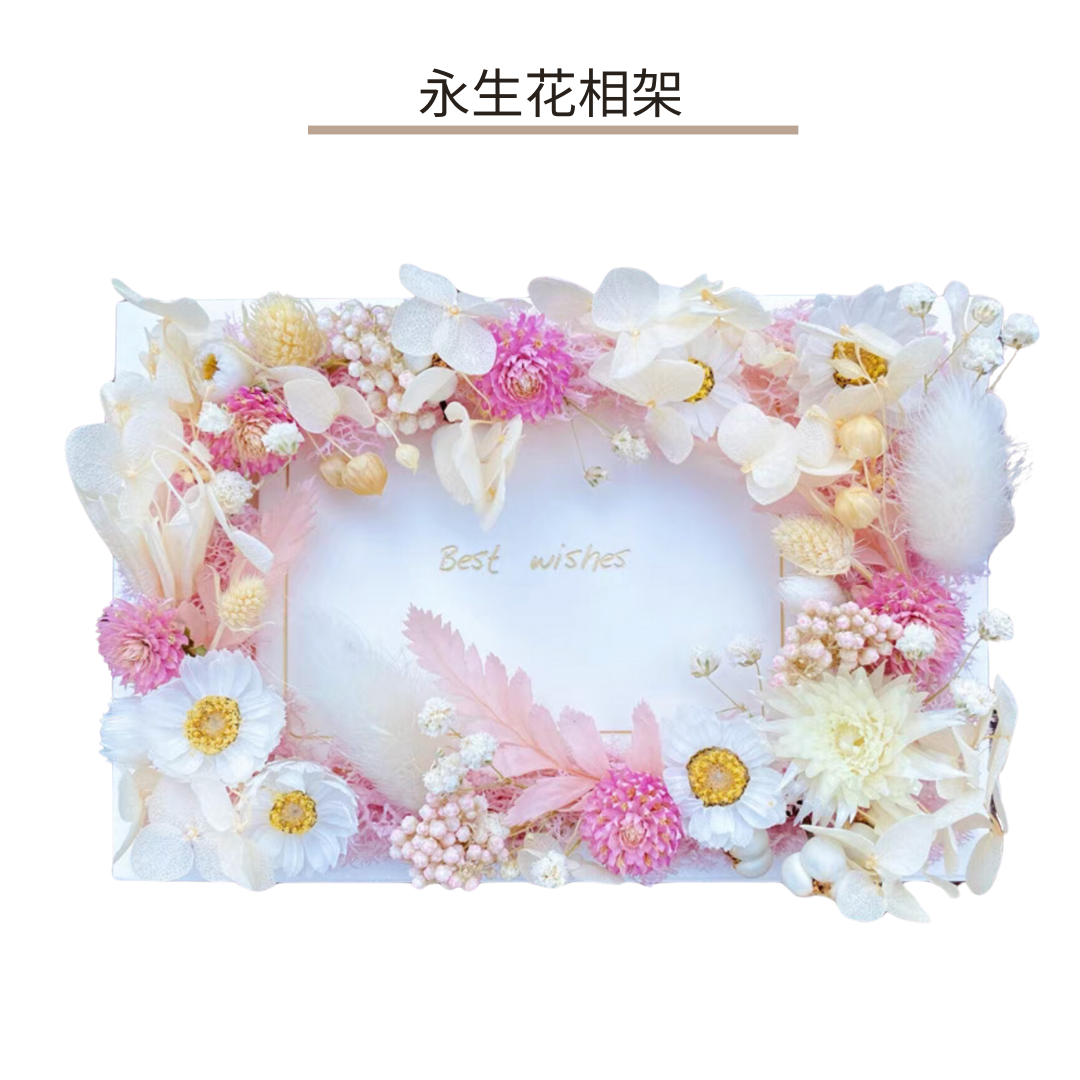
Preserved Flower Photo Frame | Pink Collection | Set of 5
Preserved Flower Photo Frame | Pink Collection | Set of 5
Regular price
HK$440.00
Regular price
HK$108.00
Sale price
HK$440.00
Unit price
per
Shipping calculated at checkout.
Couldn't load pickup availability
Set of 5, individual purchases not available
A. Product Information
Difficulty: ★☆☆☆☆
Production time: approx. 45 minutes
Size: 10x15cm
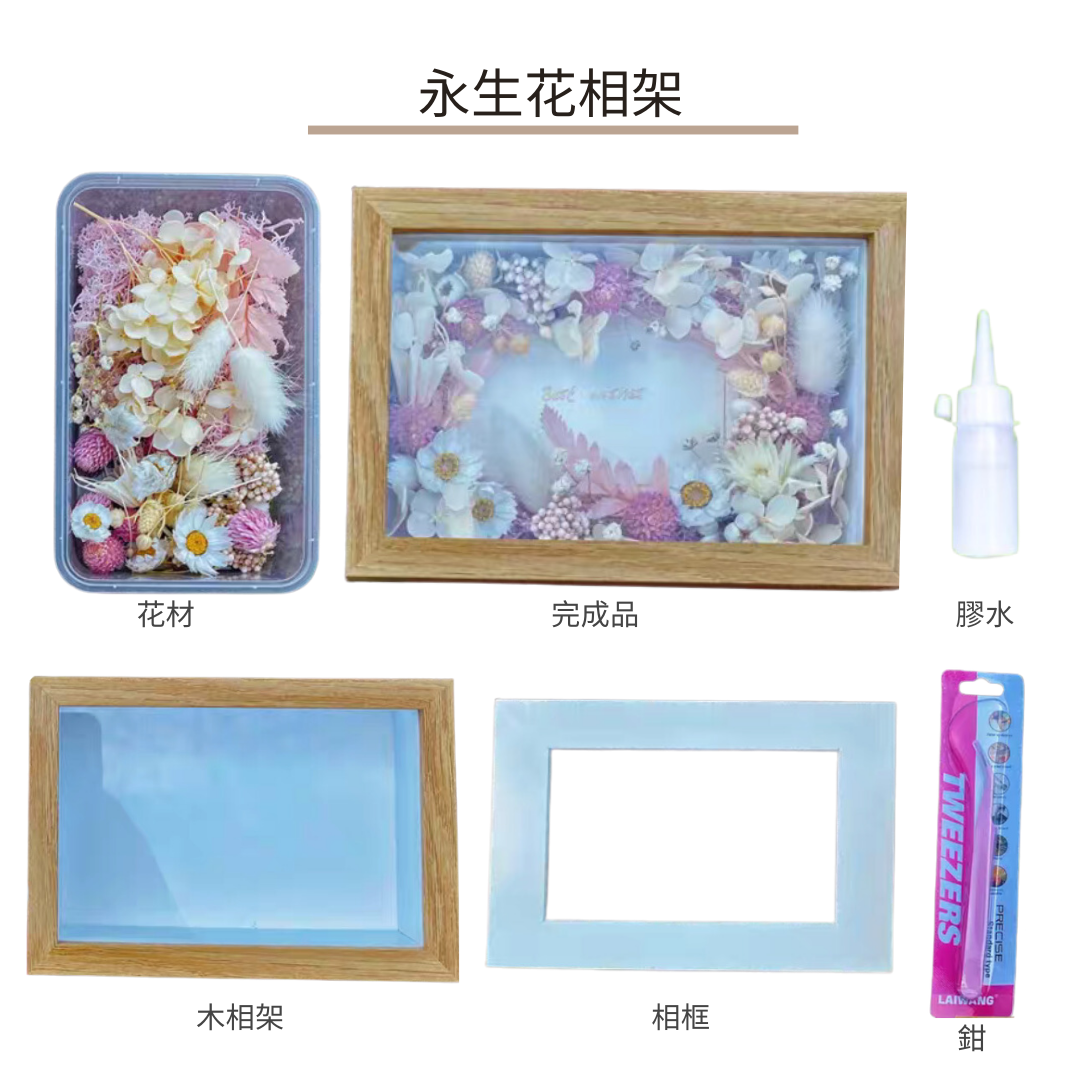
Material kit: Floral materials, glue, wooden frame, photo frame, pliers
*The actual product may have color differences due to lighting
*This product is a material kit and requires self-assembly
*We use natural floral materials. Some materials may be substituted with other varieties due to different flowering seasons; there may be slight differences in color and shape
Customer Service: Whatsapp +852 6104 5134
B. Production Tutorial
- Sort the flowers: Pour out the floral materials and roughly sort them by size and type (e.g., main flowers, filler flowers, foliage) for easy access.
-
Dry Run (Layout): Lay the wooden frame flat and begin arranging the floral materials on it.
- Suggested order: Decide the placement of the largest, most eye-catching "main flower" first. Placing it in a corner (e.g., bottom left or top right) is usually more aesthetically pleasing than placing it in the center.
- Add layers: Next, use secondary flowers and foliage to surround the main flower and fill the gaps. You can let some leaves extend slightly beyond the frame to create a natural, growing effect.
- Consider color: Match the flower colors to the color scheme of the photo you have prepared to ensure a harmonious overall style.
-
Start gluing:
- Glue one by one: Following the "layout plan" you just took a photo of, start gluing from the bottom layer with the largest leaves or flowers.
- Insert photo: Carefully place your photo into the frame, let it sit for at least 1-2 hours, ensuring the glue is completely dry so the flowers are securely attached.
C. Purpose of Production
| Target Group | A. Learning and Training | B. Benefits and Development |
|---|---|---|
| Elderly | 1. Tool application training: Learning to use basic tools like pliers trains fine motor skills as well as hand strength control. 2. Spatial layout planning: Creating on a fixed 10x15cm canvas provides better training for overall composition and spatial balance than small circles. |
1. Emotional and memory connection: Old photos full of memories (e.g., children when they were young, photos with a partner) can be placed in a handmade frame, becoming an emotional anchor and storytelling object. 2. Enriching the living environment: The finished product is a practical home decor item, allowing them to personally add beauty and personal flair to their living space, improving quality of life. |
| Children | 1. Basic tool safety education: Under adult supervision, the first-time contact with and learning to safely use pliers is an excellent tool introduction. 2. Introduction to graphic design: Learning how to decorate around a theme (the photo in the center) on a 2D plane helps establish concepts of foreground and background. |
1. Strengthening family values: Making a frame specifically for family photos helps them feel the warmth of the family during the process, deepening their sense of belonging to "home." 2. Learning to create "valuable gifts": A photo frame carries more weight than an accessory, making it suitable for occasions like Mother’s Day or Father’s Day, helping children understand the value of combining heart with practicality. |
| Teenagers | 1. Practical application of visual arts principles: Apply art principles learned in class, such as composition, color matching, and visual focus, directly to the design of the frame. 2. Multi-material combination skills: Learn how to combine fragile floral materials with a hard wooden frame and consider the bonding and pairing of different materials. |
1. Building a personalized space: Creating a unique frame for their room or desk to display photos with friends or idols is an important part of building personal style and a private space. 2. Boost in self-esteem: Completing an artistic and practical piece of home decor brings a higher sense of achievement and satisfaction than making small ornaments. |
| Adults | 1. Home aesthetic design practice: More than just a craft, it is a mini interior design exercise, contemplating how to integrate the work into the overall home style. 2. Project-based creative thinking: Experience a complete mini-project flow, from selecting the photo (core content) to conceptualizing the design and executing the project. |
1. Creating "ritual of memory": Handcrafting an exclusive "home" for a special moment (e.g., travel, anniversary, pet photo) makes memory preservation more meaningful. 2. Healing: Focusing on beautifying objects closely related to one's life can bring deep relaxation. |
D. Common Questions During Production
| Problem Type | Potential Issues | Solutions |
|---|---|---|
| Tools and Materials | 1. How do I use the pliers? Will I break the flowers? 2. What if petals accidentally break off? |
1. Use the pliers to grip the "bottom of the stem" for support; do not grip the petals. 2. This is normal; small fragments can be used to accent gaps for added detail. |
| Design and Composition | 1. I have no idea how to arrange it to look good. 2. My design looks too empty or cluttered. |
1. Try it out before gluing. Place the largest main flower first, then surround it with small flowers. 2. Focus on 1-2 corners only; appropriate "white space" makes for a better design. |
| Gluing Techniques | 1. I squeezed out too much glue and it overflowed. 2. The flowers don't seem to stick securely. |
1. Use a toothpick to apply glue to precisely control the amount. Excess glue can be wiped away with a cotton swab. 2. After applying glue, gently press for about 15 seconds to help initial fixation. |
| Assembly and Maintenance | 1. How do I reassemble the frame? 2. How do I maintain the finished product? Can it get wet? |
1. Place the photo in first, then attach the back panel and fasten the clips. 2. Keep it away from water. Avoid direct sunlight and high humidity to preserve it for a long time. |